
Hannah Genders reveals the art of low-maintenance gardening.
I have just completed my New Year’s resolution – well, that’s not quite true; it needs tweaking, but it’s nearly completed.
My resolution this year was to make my front garden low maintenance so I could spend more time tending the vegetable plot and pottering about in the back.
I also foolishly mentioned this in a previous article and have had a number of comments from neighbours who noticed nothing was happening.
For anyone else wanting to make their garden or part of their garden lower maintenance, I thought I’d talk you through the process of how I did ours.
For me this was an ideal solution for my front garden, but I personally wouldn’t want to make my whole garden this neat! Firstly, you need to remove all the existing plants.
Many of mine were cottage garden perennials; I only kept one shrub that was too large to move and has an important function in my garden.
As well as providing some structure, leaf and flower colour it is a landing point for the blue tits and sparrows that nest every year at the front of the house.
The blue tits come back to the bird box and the sparrows nest in the ivy just under the kitchen window. They all land in this shrub and have a good look around before flying into the nest.
There are always scuffles breaking out between the breeding pairs as they fight for territory but, bless them, they still come back each year and I feel it is the least I can do to keep providing a landing stage.
Anyway, back to the work schedule. When the bed is cleared, remove enough top soil to drop the level about one to two inches below the edge of the bed – this will keep the mulch you use from spreading over the adjoining path or patio.
Then cut some landscaping membrane to fit the bed and cover the soil area completely; this membrane allows rain to go through but will stop any weed growth coming up.
Oh, and do secure it with bricks so it doesn’t blow away before you put your mulch on.
Place the plants you want to put in the border, cut a hole in the membrane and plant in the normal way allowing for an inch of mulch around the base of the plant. Water the plants in well and finally spread one to two inches of mulch over the membrane area.
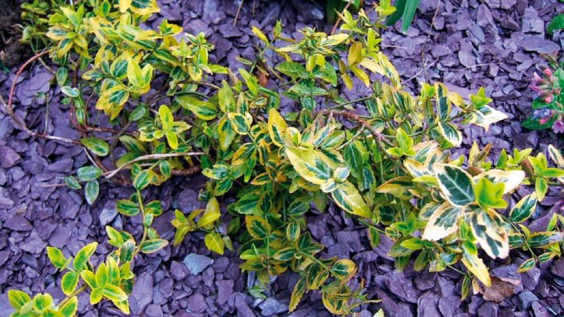
Mulching can be done with a decorative gravel – 10mm usually looks best. In chipped slate, I choose a plum coloured slate and I love the effect you can create with leaf colours, contrasting them with the blues of the slate.
Woodchippings can also be used and although they are the cheapest option they will need topping up each year.
To finish the area, add a few large pots and your border will stay weed-free for years to come, giving you time to tend the vegetables, mow the lawn or – more importantly – sit down with a large gin and tonic…
